Memory Hearts

Having something to hug when you have lost a loved one or favourite pet, feels so good.

A Memory Heart is a hand-made, unique, beautiful heart shaped glass object, in which the artist places a tiny amount of your loved one’s ashes. Forever you have their memory to love, hold and hug.

The hearts can be made with the ashes visible. or hidden within the centre of the glass. They are approximately 4cm high.

Other options are to order them with a loop and ribbon, loop and necklace or without a loop.

You may require more than one heart, if so, as they are unique, they can be made in similar or different colours:- a range of colours is illustrated in the palette.

Prices:

Without a loop – £20

With loop and ribbon – £25

With loop and necklace – £30

To order: please use the contact button below. I will need a teaspoon of ashes to be posted to me – any unused ashes will be returned to you with your heart(s).

Pocket Hugs Video

I thought you might be interested to see how I make the Pocket Hug hearts so here is my video.

Here are some I made earlier (to use a well known phrase!). They are £6 each (incl p&p Mainland UK and NI).

If you’d like one (or two) please use the contact button below. Please add your email address carefully as I can’t reply if it’s not correct.

When you contact me I would like to know what colour(s) you are interested in, what extra message you would like included on the Pocket Hug card (love from….etc), and whether you would like to pay by Paypal or bank transfer.

Thank you so much for looking at my pages.

Glass Pocket Hugs

It’s been a difficult year with no direct hugging of anyone outside your bubble so how about sending someone you’d like to hug a Pocket Hug. These hand made glass hearts come in lots of colours. Here are just a few:

I can post them direct to your recipient and include a message from you on the Pocket Hug card. I can send you photos of more hearts if you wish to see a bigger range.

Price: £5.00 (incl UK P&P).

Contact me on the button below to order your hearts. Please be careful to enter your email address correctly.

Mothers’ Day Pocket Hugs

We face a different Mothers’ Day this year as we may have been apart from our Mothers for a year. Although I met my daughters during easing in 2020 I wasn’t able to give them a hug. So here is an idea for your Mothers, or sisters, fathers, favourite Aunties or your GP.

These beautiful hand made hearts are smooth to feel and gorgeous to look at. They are available in other colours too. A lovely reminder of someone who cares about them.

They are £5.00 each, including p&p to the UK.

Please use the contact button below to get in touch

Steam Train

I’ve just finished this mosaic project. I started it last year but used the lockdown to complete it. Ultimately it will be hung on our garden fence but meantime we’re showing it off in the front garden.

We love steam trains and hope to have our own model layout soon – we’ve been planning it for over 10 years! Maybe now we’re both locked down we might start it. Anyway, I had the idea to make a large project and drew it out on hardie backer board which is perfect for outdoor projects. It measures 80 x 120cm so it’s no small piece but it was lovely to work on something big.

When lockdown ends I run mosaic workshops so you could come and learn how to make picture for yourself. However, if you’d like to commission me to have more fun in the sunshine and make you a mosaic picture for indoors or outdoors and any size do get in touch.

Lockdown progress

What have you been up to during this period of Lockdown? Like me, perhaps you’ve re-decorated everything in sight, cleaned out your cupboards and now have a stock of bags to go to charity shops, whenever they re-open!

I have also been working on some creative ideas.

I was cleaning the studio, repainting bits that need repainting and generally trying the occupy my time well. On one of the shelves I found some mosaic tiles that I had been ‘keeping for a rainy day’! They are Smalti tiles which are a particular Italian glass tile. They are formed into rounds – pizza –  and then cut up into rectangular chunks of a fairly regular size. I had bought two sets of mixed colours, so I sat down to sort them out. At first, I thought I had 4 or 5 shades of each colour, then discovered that there were actually 11 or 12 shades of each colour. I do enjoy sorting things, jigsaw pieces, mosaic tiles etc so I had fun trying to sort them into one continuous colour line.

My husband suggested that I mosaic the step into my studio but when I looked into using smalti I discovered that they are unsuitable for walking on. The tiles are meant to be used sideways, cut side uppermost, but that surface is very uneven. The benefit is that light reflects differently off the surfaces, giving a particular effect, but not suitable for walking on. Also, unusually for mosaic tiles, smalti are not usually grouted.

So, I designed a piece for our garden. We have a messy bit of garden (as one does) and we’re going to put up a screen with the picture hanging on it. See what you think:

Smalti 70%

It’s very colourful and I look forward to seeing it hanging in its new home.

I wish you a healthy time during this weird period of our lives and I hope to be running workshops and attending craft fairs soon.

Jane

Lampwork bead making, a beginner’s story

Father Christmas, aka my husband Bernard, gave me a lampworking beginners kit for Christmas. He then helped me to set it all up in my lovely studio. If you don’t know what is involved….well listen in.

To make beads from glass you need a torch (like a flame thrower), in my case I have a Nortel Minor (irrelevant detail but hey ho). This needs to have a supply of propane gas – cylinder outside the studio, and an oxygen supply – oxygen concentrator inside the studio. This last is a refurbished medical oxygen machine which is no longer good enough for medical purposes. The result of this gassy mix is a flame that is about 1400C, hot enough to make glass rods go soft.

Then you need some metal mandrels to form your bead on, a few tools and then glass rods……this is where it gets yummy. My supplier sells them as individual colours or in mixed bundles. This is very exciting ‘cos you never know which colours are coming and I haven’t been doing it long enough to get discerning. Mine have all come from Italy so far but there are other options too.

So, I light the torch (carefully) and sit down and make beads. Sometimes they go right, and sometimes they go wrong. When I get good enough to make big beads (if I get that far) it can take hours to make just one….look on websites for some real beauties. After the bead is made they have to be cooled slowly and then annealed. This means that they are put in a kiln (I have one handy!) to be gently reheated and  cooled very slowly. This allows the glass to settle within it self and toughens it for making into jewellery. I choose to batch anneal my beads once a week. I will be demonstrating bead making during Art Weeks and you will get to take the bead away with you as a reminder.

As with other practical skills it takes time to get good at it. The experts reckon about 500 beads, well I’m on about 150 and some are OK. Ultimately I want to make glass animals and I have a good dragon and a turtle / tortoise so far. I will be going on a couple of courses to improve these techniques.

Lampwork hearts day

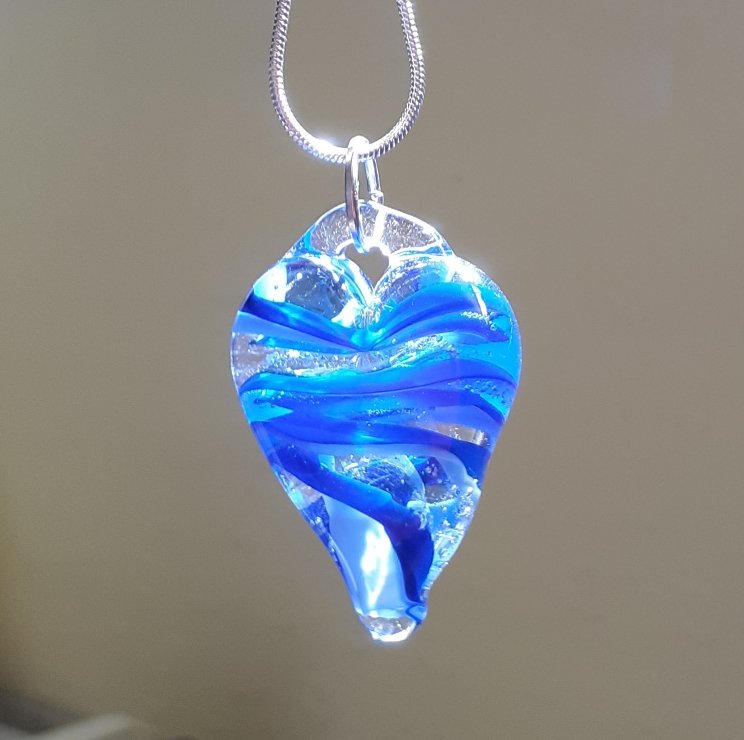
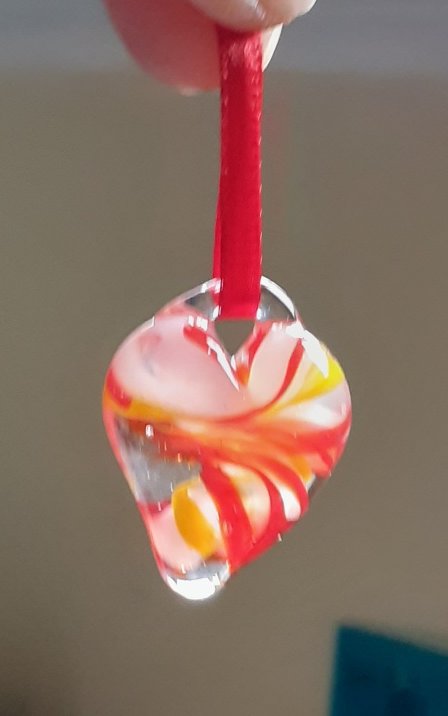
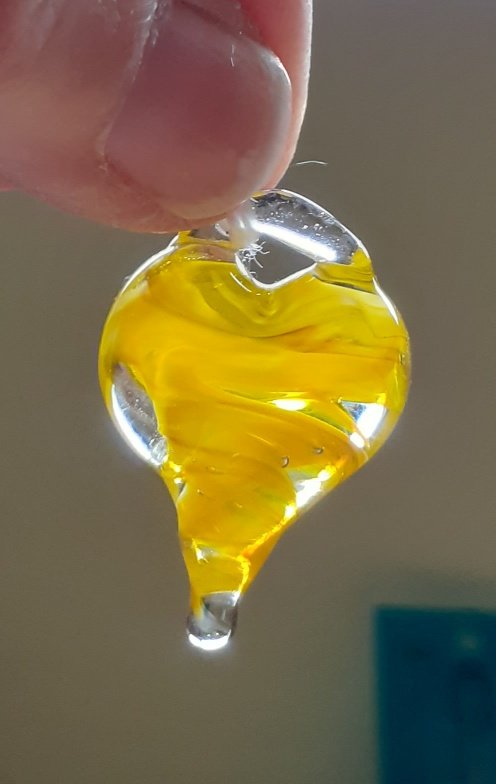
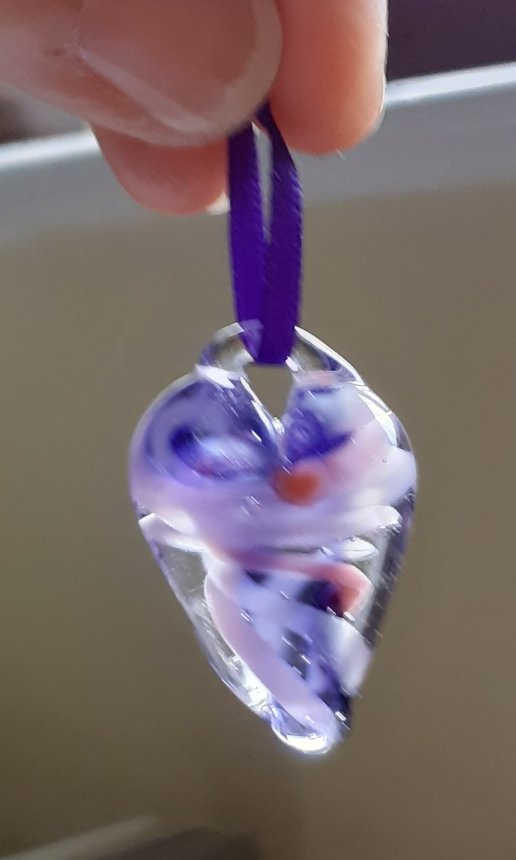
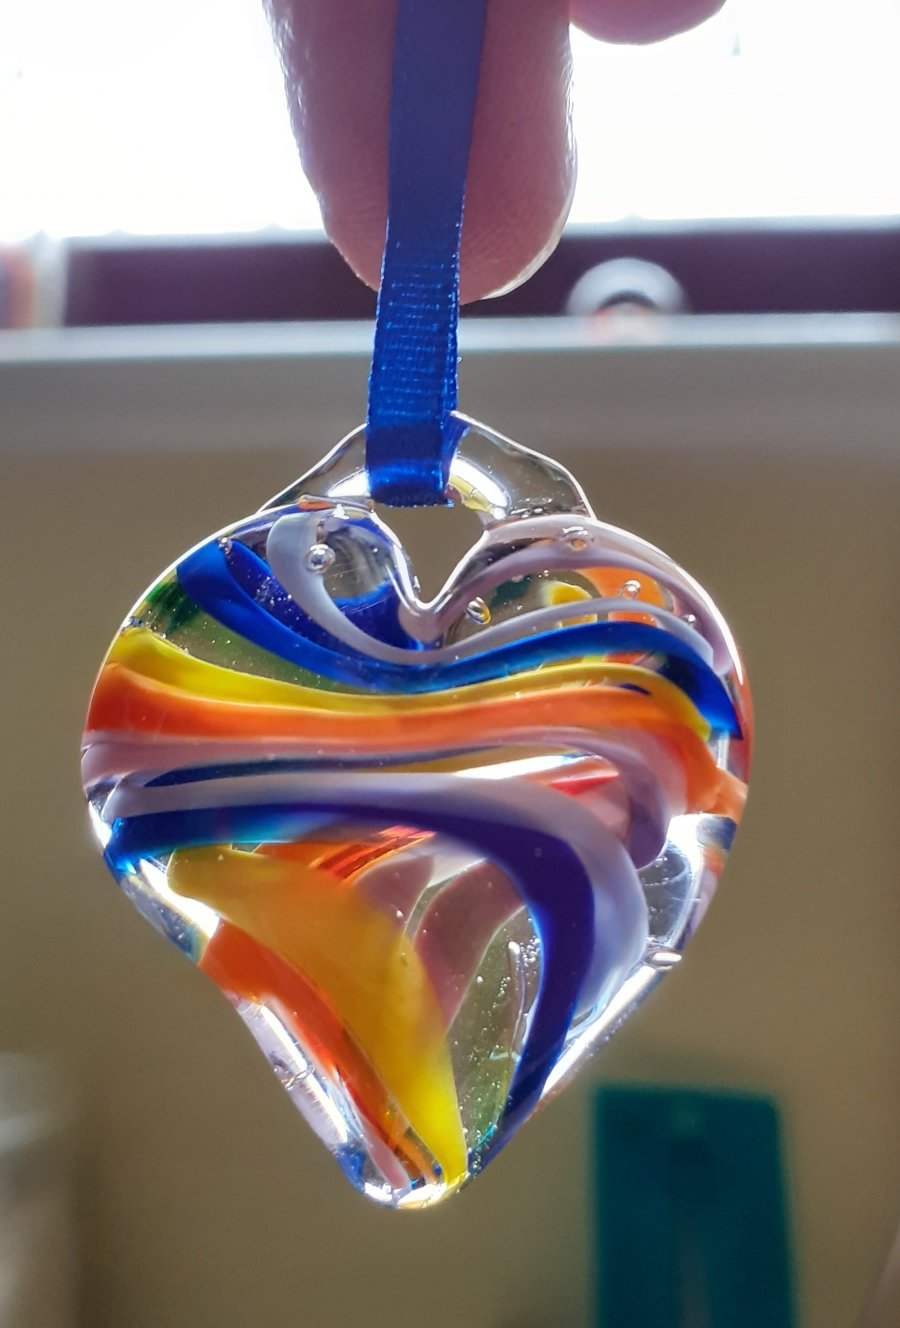
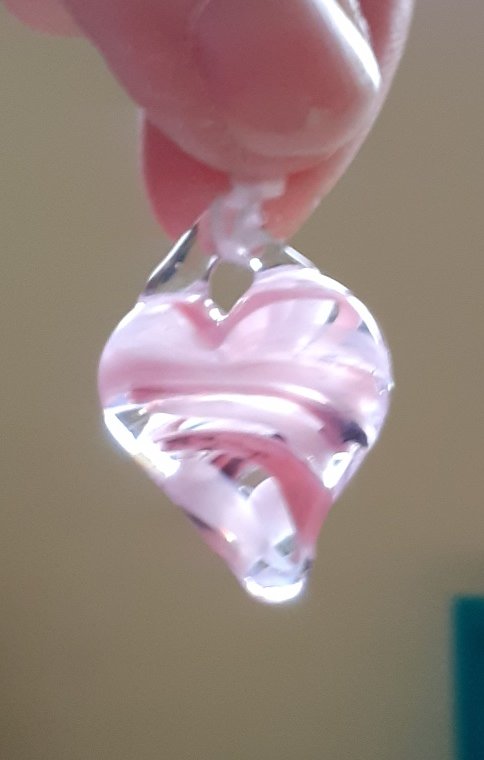
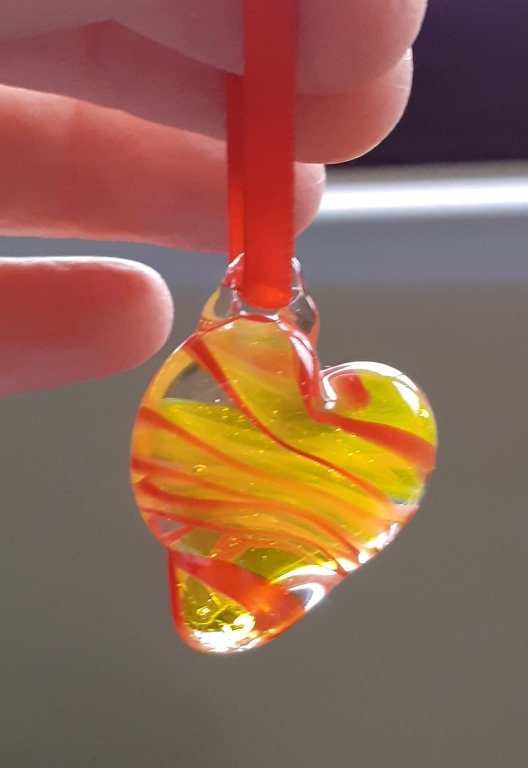
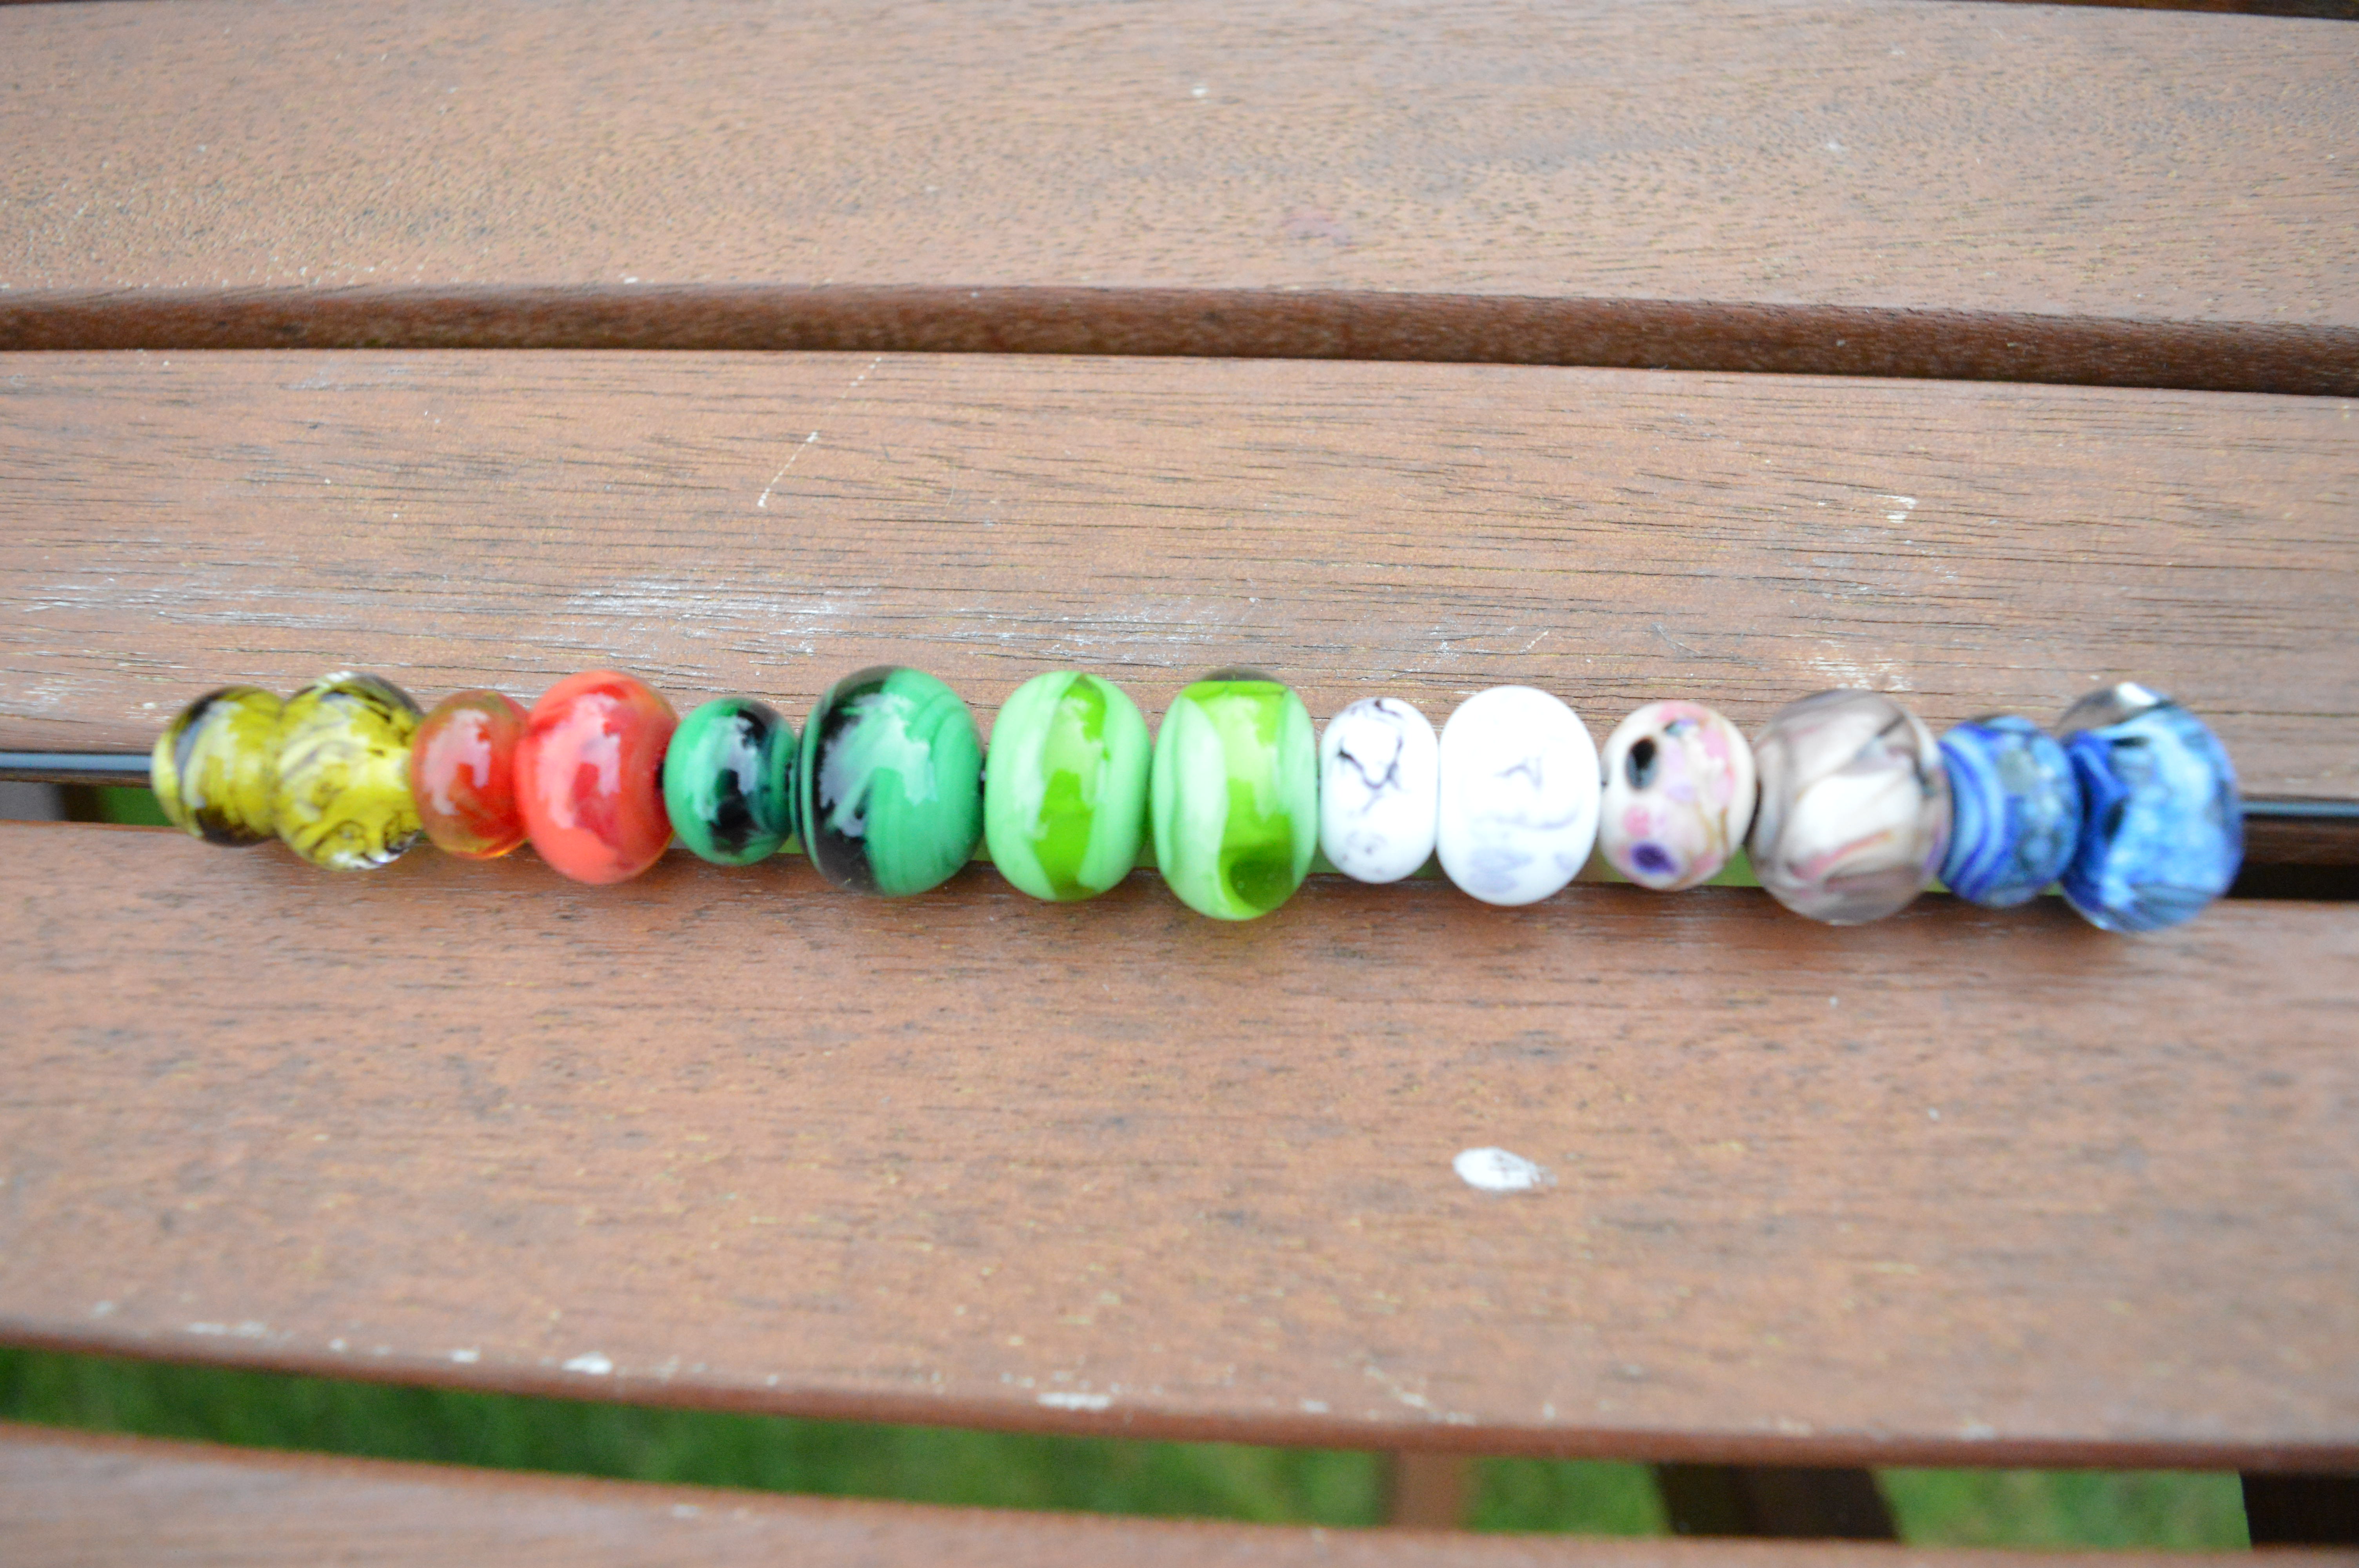
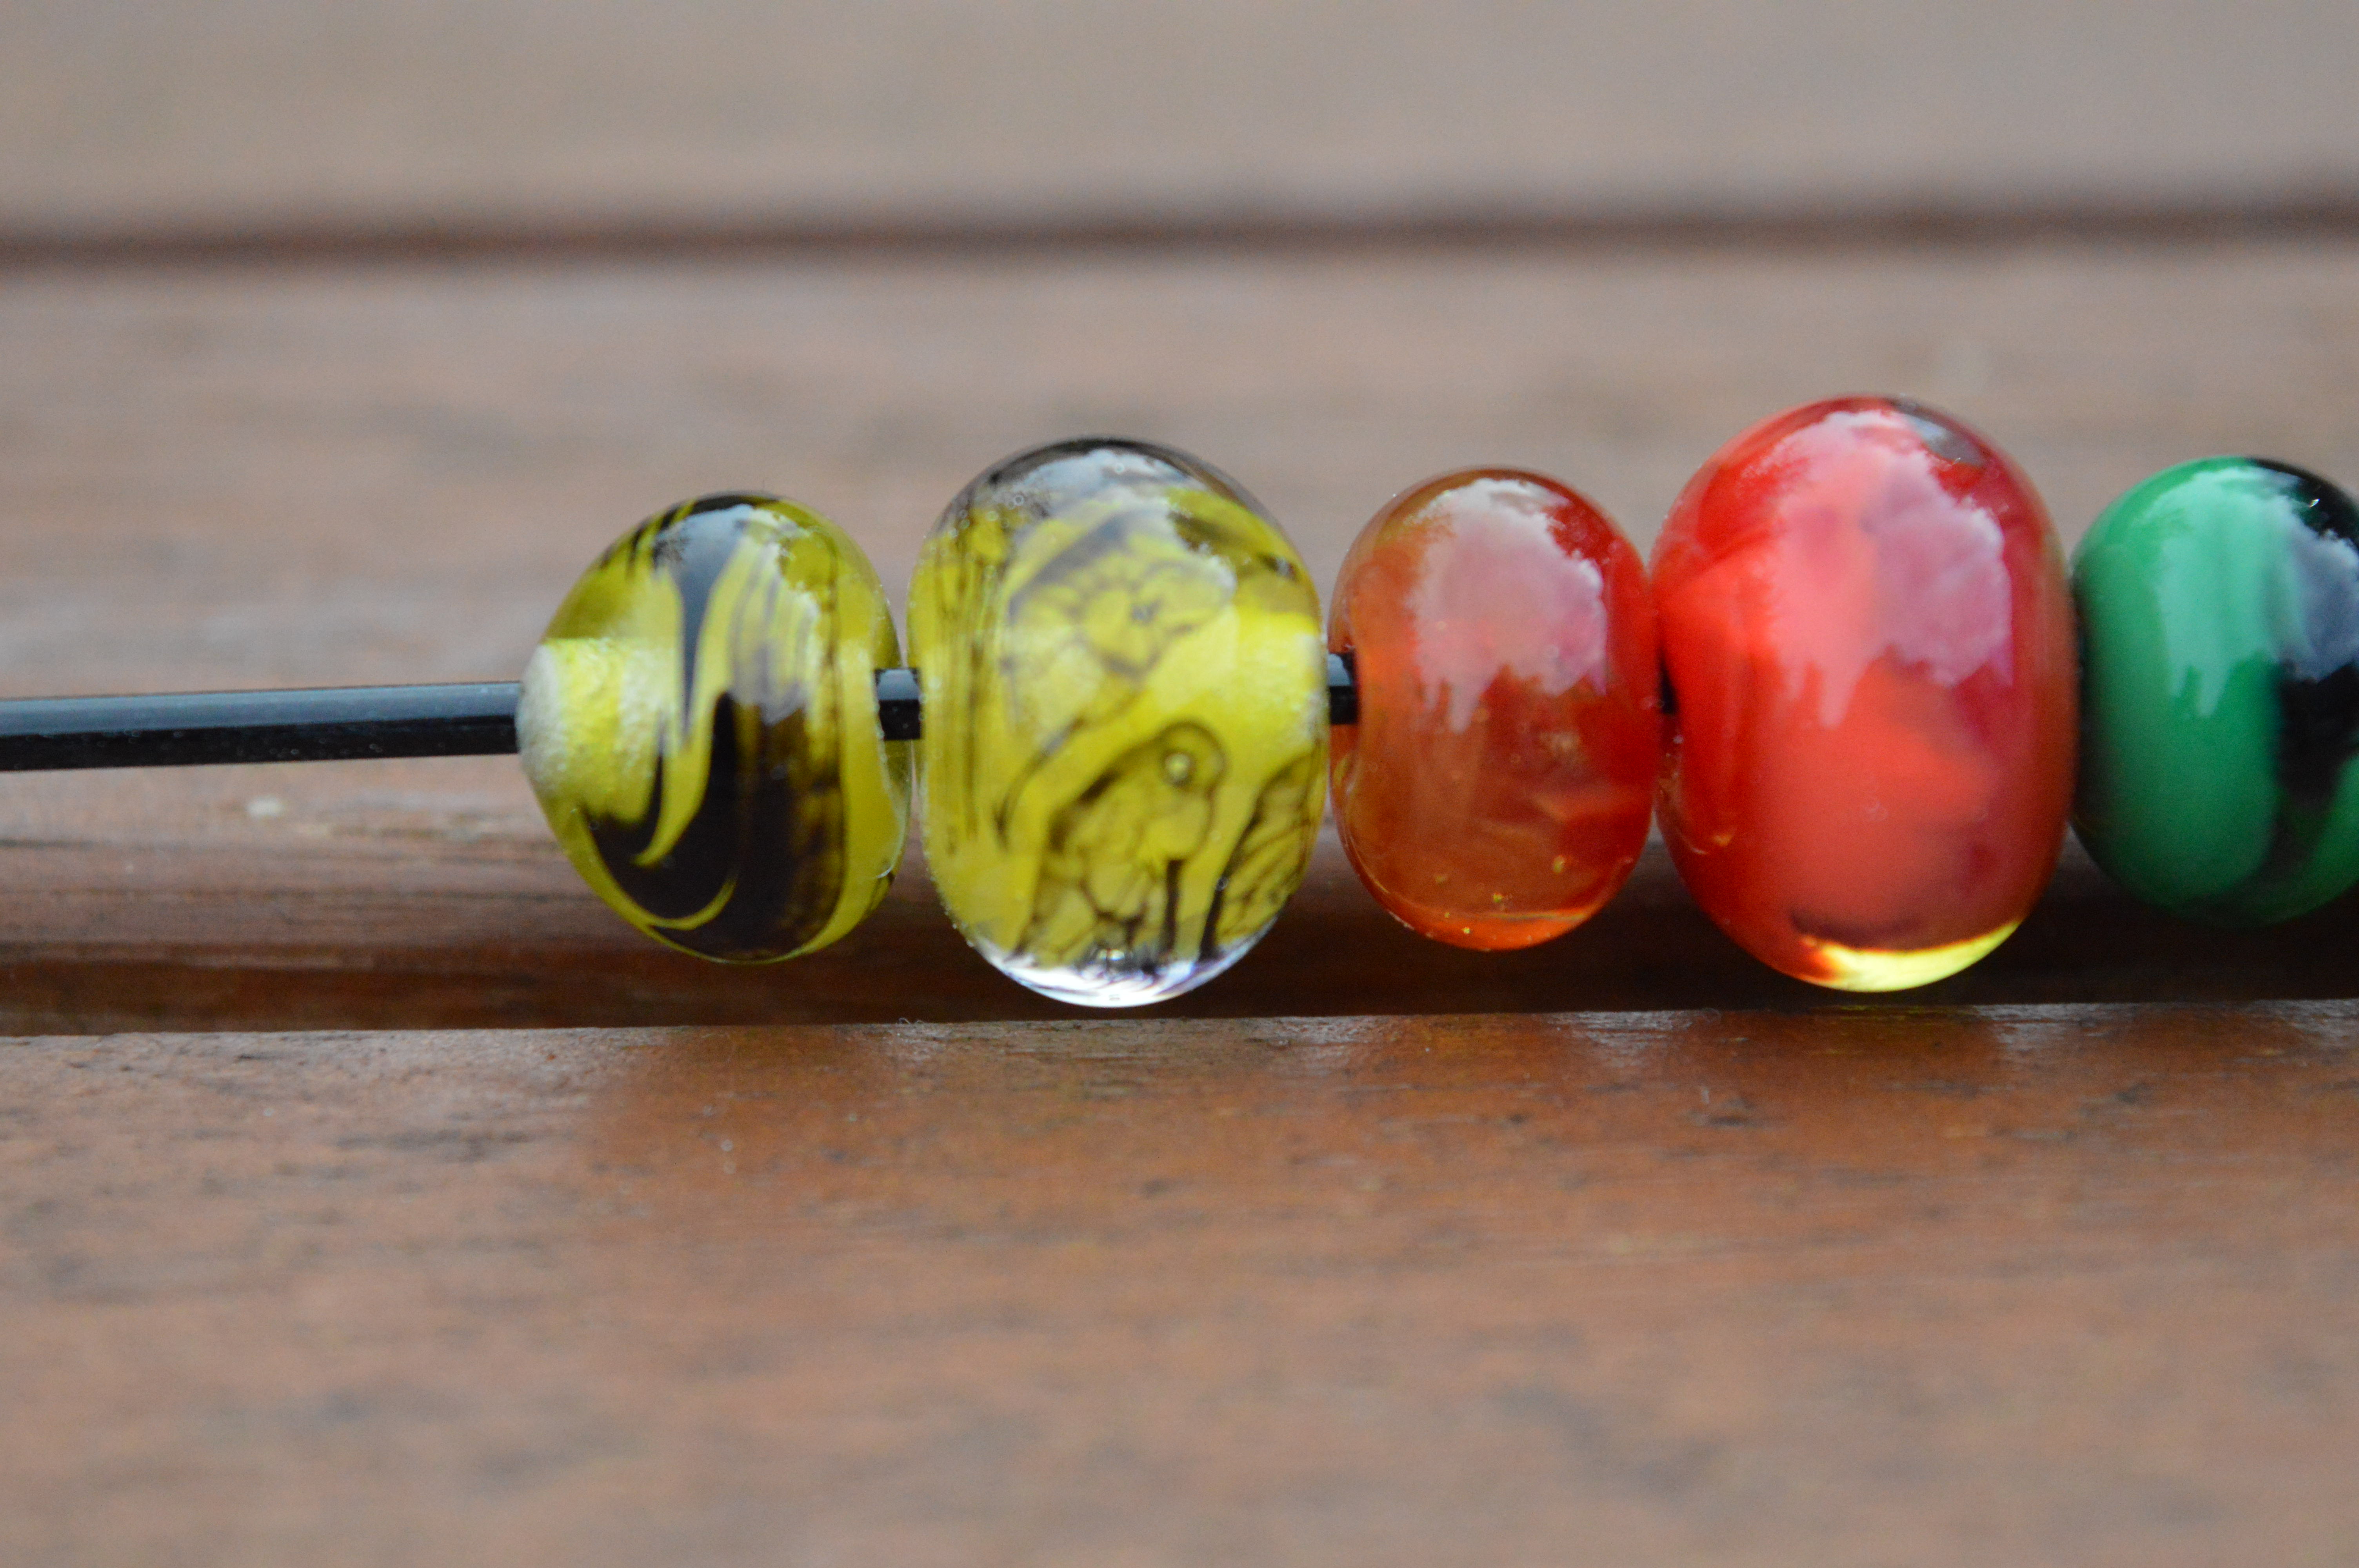
These are a few of my first ones. They are not perfectly formed as yet but I love trying different techniques.

20180217_100526_resized

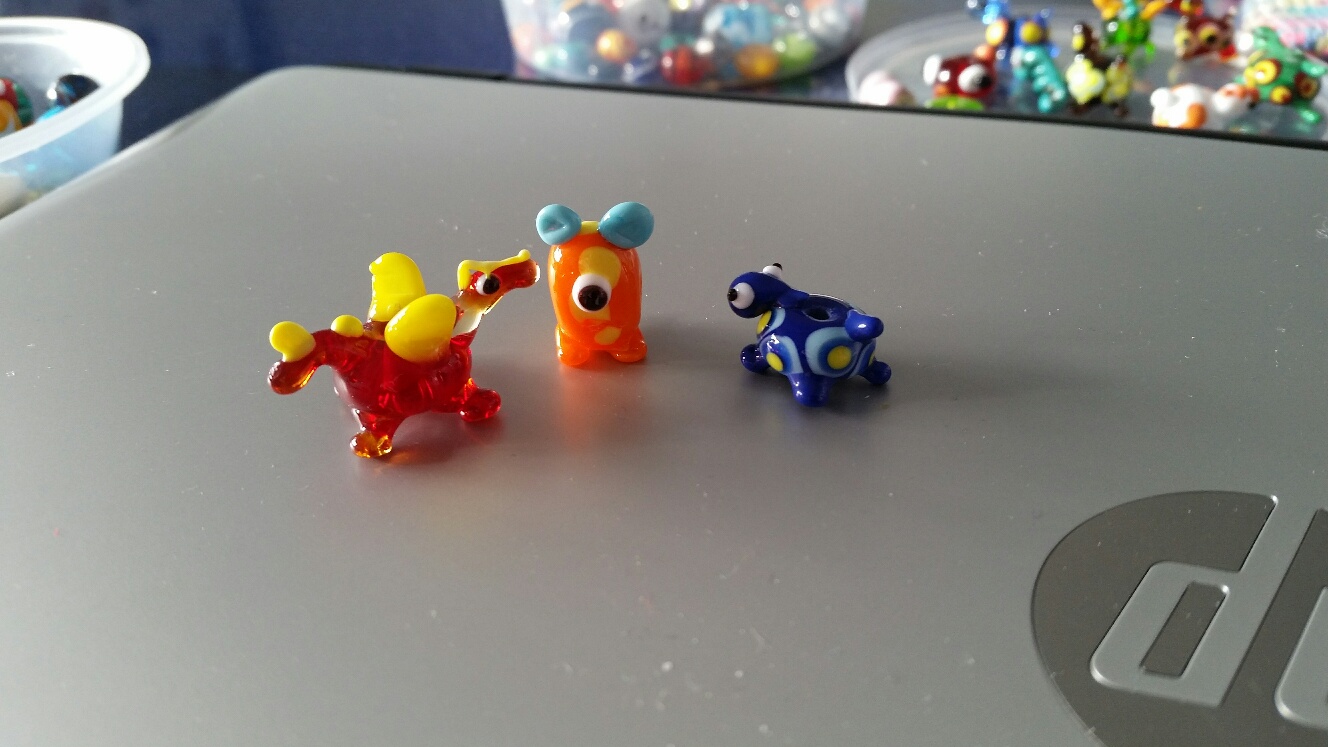
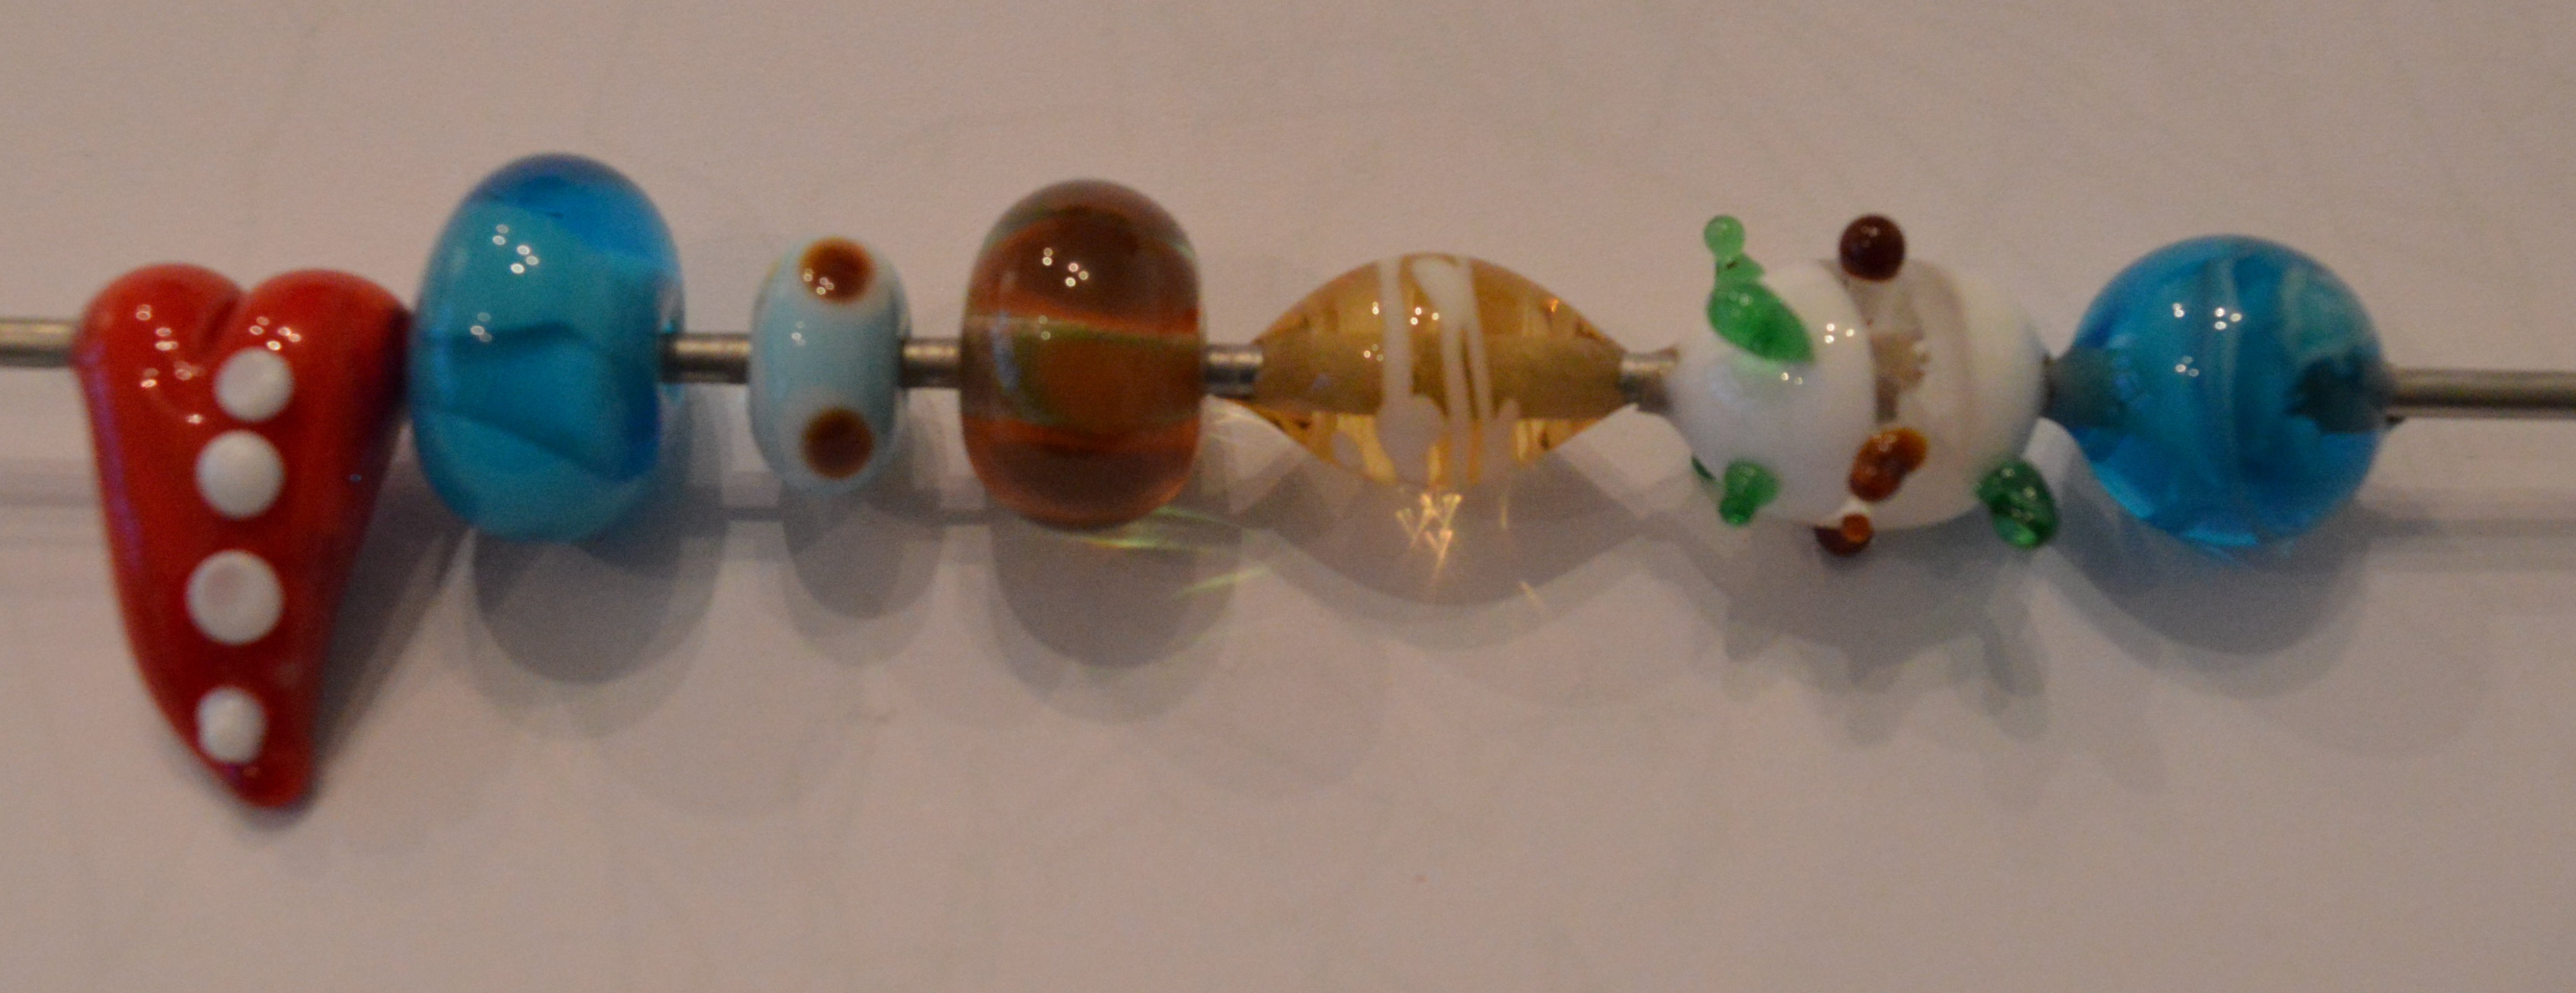
And here are some creatures I mentioned. The one in the middle is just a creature….I like quirky as you may have gathered.

Meanwhile, back to have a go at some more – the design possibilities are endless, just need lots and lots of practice.

Lamp working course

I recently went on a glass bead making course. Ultimately I would like to make glass animals but I had to learn how to make beads first. It was great fun and not just a little bit scary, after all, the flame varies between 800 and 1400 degrees!

Lampwork class 1

The technique goes a little like this:

With the flame lit and adjusted properly (by the tutor) you take a mandrel (metal rod dipped in bead release) in your left hand, and a glass rod of your chosen colour in your right hand. You need to warm both up gently. Once the glass rod is hot enough and the end goes molten drop the glass onto the mandrel which you rotate away from you. Build up a catherine wheel of glass on the mandrel until it’s about and inch across. Take the mandrel in both hands on the right of the flame and put the glass in the flame whilst turning it gently. Ultimately the glass melts and forms a rounded bead on the mandrel. Once it’s round remove from the flame, continuing to turn it until the glass goes dark. Plunge into vermiculite and leave to cool. The beads should be annealed in a kiln to ensure that they don’t fall apart in the future.

Now, all of the above sounds straightforward, and, with the help of a great tutor it is. However, like all practical skills it takes a bit of time to get a round bead as even longer to get a matching set (not something I was trying to achieve, thank goodness).

The fun is in mixing colours together to make wonderful patterns. A crafting friend makes fantastic bead spiders which I use on my stall at craft fairs to draw people’s attention (you like them or hate them but it takes you attention) so I decided to make pairs of beads for spiders.

Lampwork 1

In just over two hours I made all of the above beads and am thoroughly delighted with them.

Lampwork 3

The detail in the yellow ones is fantastic and the larger one has a clear topping which gives the underneath detail some depth. They’ll make fantastic spiders!