I’ve finally decided to publish my latest Brochure. It’s always difficult to know when to publish it as I am creating new products and ideas all the time. However, I think it’s time to show the world what I have in stock. The newest creation is a soap dish large enough for a standard bar of soap. The one shown is in stunning turquoise but I have more to fuse and will be different colours – you just have to ask. My Christmas Brochure is also available. Enjoy browsing and get in touch if you’d like to buy something or ask for a commission.
Another Creative Opportunity!
I’m sure I’ve mentioned before that there’s no such thing as a mistake in art work – it’s just a creative opportunity and, although a piece of glass may not come out of the kiln as the artist might expect it still is a beautiful piece that someone will like.
So, with that as a pre-amble of course I’ve had another such moment.
Those who know me well know that I like to experiment and try new crafty ideas out. I had seen an idea about making something using frit slurry. Frit is powdered or finely crushed glass and you make a slurry of it with water. So I had fused two large pieces of clear glass together to make the base and then applied my frit slurry to the surface. Using the slurry method allows you to add lots of frit without it all falling off the piece as you do need to add a thick layer to enable you to see the design. You have to leave it to dry before fusing and then it is very fragile but here’s the piece before firing.

You will realise when you look at the final piece that glass can change colour in the kiln – that’s one of the fun bits….what colour will it come out? The article that I got this idea from gave a firing schedule for a fuse and slump in one firing. So, here goes…
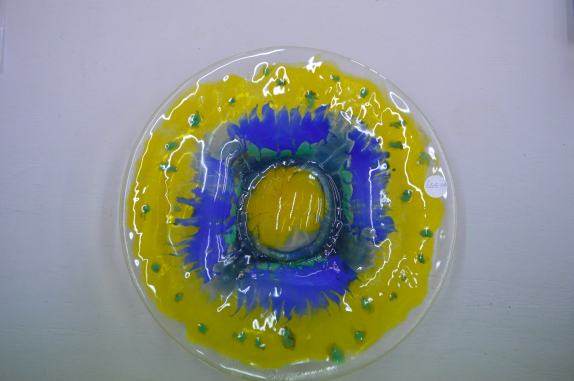
I was delighted with the colours and effects of the mix but not so delighted with the lump in the centre of the dish. I decided to try and slump it again but the lump just got a bit bigger.
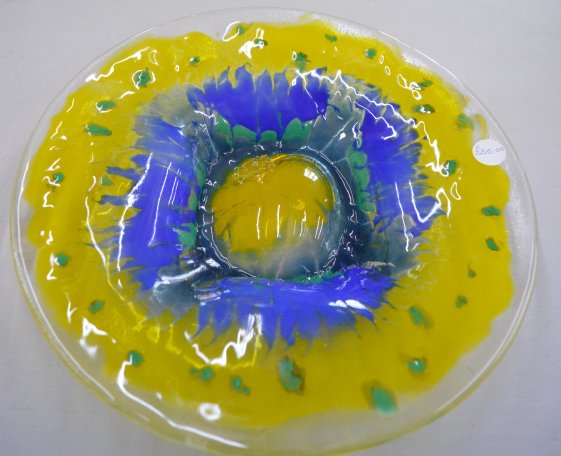
I decided that it was far too colourful a piece to tuck away in the studio so it is for sale. It looks fantastic on a stand in front of a window as the frit is partly transparent
I’m working on an update to my brochure which I’ll publish in the next week or so, it will have my Christmas Collection in it too.
Happy Daze
Share this:

Amuse Bouche dishes
No, this is not a cookery blog but I will explain. An amuse bouche is a morsel of food that ‘tickles’ the mouth. If you get one in a restaurant then it is usually free of charge. They can be served on very small plates.
A couple of weeks ago I was at a craft fair in Chipping Campden, deep in the Cotswolds. An American couple stopped by my stall and were very interested in my teaspoon rests. However, they asked whether I could adapt the design to make a pieces slightly bigger. As I had created the mould myself from fibre board and had plenty left over I could oblige. They placed an order for eight black and white dishes which I have just completed.
They form a great pattern. I am hoping that they will share some photos of the dishes in use.
I’m always keen for new ideas of things to make and this was a great challenge. I look forward to others in the future.
Share this:

Lamp working course
I recently went on a glass bead making course. Ultimately I would like to make glass animals but I had to learn how to make beads first. It was great fun and not just a little bit scary, after all, the flame varies between 800 and 1400 degrees!

The technique goes a little like this:
With the flame lit and adjusted properly (by the tutor) you take a mandrel (metal rod dipped in bead release) in your left hand, and a glass rod of your chosen colour in your right hand. You need to warm both up gently. Once the glass rod is hot enough and the end goes molten drop the glass onto the mandrel which you rotate away from you. Build up a catherine wheel of glass on the mandrel until it’s about and inch across. Take the mandrel in both hands on the right of the flame and put the glass in the flame whilst turning it gently. Ultimately the glass melts and forms a rounded bead on the mandrel. Once it’s round remove from the flame, continuing to turn it until the glass goes dark. Plunge into vermiculite and leave to cool. The beads should be annealed in a kiln to ensure that they don’t fall apart in the future.
Now, all of the above sounds straightforward, and, with the help of a great tutor it is. However, like all practical skills it takes a bit of time to get a round bead as even longer to get a matching set (not something I was trying to achieve, thank goodness).
The fun is in mixing colours together to make wonderful patterns. A crafting friend makes fantastic bead spiders which I use on my stall at craft fairs to draw people’s attention (you like them or hate them but it takes you attention) so I decided to make pairs of beads for spiders.

In just over two hours I made all of the above beads and am thoroughly delighted with them.

The detail in the yellow ones is fantastic and the larger one has a clear topping which gives the underneath detail some depth. They’ll make fantastic spiders!
Share this:

Friends’ fun and a windchime
I am at an age when my friends and I are approaching retirement age….94 or thereabouts! Well actually around 60 – I guess we’re the lucky ones who can retire at an age to still enjoy ourselves with arts and crafts. A friend retired from school at Easter and her colleagues gave her a good send off. We felt that she should have a crafting one too and invited her to a glass workshop. She has a lovely garden so decided that we would have a go at making a windchime. One friend finally couldn’t make the day so she made three peices in advance but then five of us gathered on Monday to create a masterpiece. The retiree hadn’t been to my lovely studio before so it was all new experiences for her. She loved the idea of what we were making and had such a thrill at scoring and breaking her first piece of glass. As ever, we had a colour theme -there were six colours and all had to be used in some form on each piece of the chime. It was put in the kiln and here is the result. It has yet to be strung together but the colours and patterns are fantastic.

I had great fun creating the squiggles. I softened stringers – thin rods of glass – in a candle flame and made squiggles and shapes. If you haven’t had a go at that it’s fun and you shouldn’t burn your fingers as glass is a poor conductor of heat. The instructions are available on line.
As ever, everyone was amazed at the result. If you’d like a windchime for yourself in colours of your choosing get in touch. I’d love to have another reason to get friendly with stringers and a candle flame.
Share this:

Mosaic Project
I am very excited about a new project that I am embarking on. After Art Weeks I realised that the route for my guests to use took them down the side of our house and all they had to look at is the blank wall of the side of my studio. So, I am making a mosaic picture for this wall. It’s going to be huge – at least, it’s the largest piece I’ve made to date, 120cm x 160cm (4ft x 5ft 3ins). I decided that the picture would be an English country garden with lots of colour. I bought the backing board today and drew out the outline. I am going to have to make it outside because the board is too heavy to move about so progress will depend on the weather. The finished piece will certainly be colourful, I just hope it looks like a garden full of flowers.
I’ll put a few pictures up when there is something to show.
On the subject of mosaic project I am holding a mosaic beginner’s workshop tomorrow. I’m really looking forward to passing on mosaic techniques so that others can enjoy the art too.
Share this:
Kiln Carving
I went on a kiln carving course last year and have had a couple of goes at it. I have an owl, a celtic knot – of which I am very pleased, a Christmas Tree – a bit out of season, and a flower. However, when I recently attended a craft fair I was asked for a penguin and…..a sloth. I hope you’ll agree that they came out rather well. Now I have been asked for a ballerina! I still have the original four for sale but that’s the way of things.


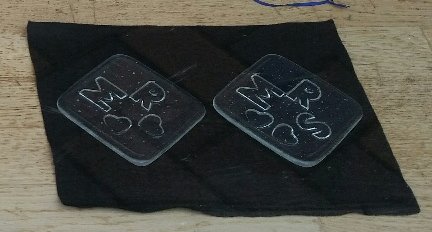
To do kiln carving you need fibre paper of various thicknesses and to have prefired two 3mm pieces of glass (clear in this case) or a piece of 6mm unfired glass. The image can be made from fibre paper in two ways, either carved out or built up. 3mm fibre paper can be carved with a craft knife and through as many layers as you wish. If you want to use the building up method you can cut the pieces out of 1,2 or 3mm paper and put them on top of each other. This is how I made these. Some of the fibre paper leaves a rougher surface than others and this can lead to very interesting and useful imagery.
You can also use lettering to spell a message. These are wedding coasters made in the same way.
Have carving
Share this:

Mosaic dish
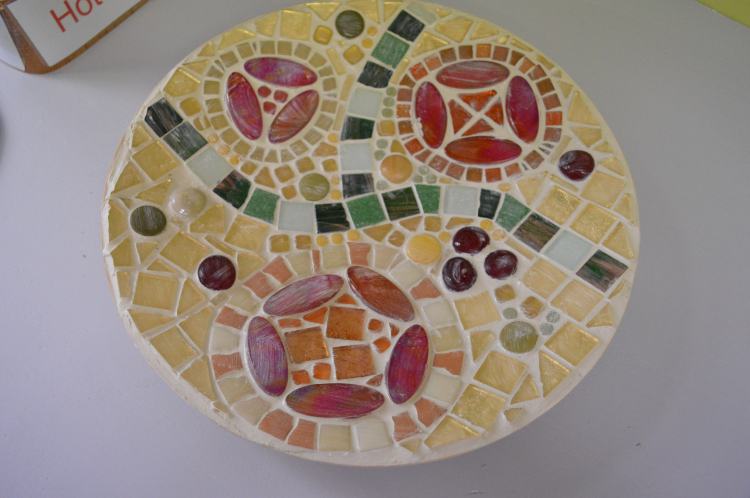
This is the beautiful dish that my neighbour made last week. It is still a little dusty from grout so will polish up much brighter but it is gorgeous. She thought she wanted a green and gold dish, but after taking some mosaic tiles back to her living room she discovered that actually she wanted red and gold with a little green. When we looked at tile options she instantly wanted glitter and shine. Although hard to see because of the dust, the pale tiles are actually gold backed glass. The ellipses were to be a big feature and she did try and put the whole pack on but eventually gave up the struggle and made do with three sets.

Here is the layout for another dish that was being made by another visitor to my studio – I haven’t yet seen the finished project because she finds it hard to put glue to tile! As you can see, any colour scheme works beautifully.
The dish measures 30 cm across so is big enough to be table centre or fruit bowl. It takes at least a day to plan and glue the mosaic tiles, then it needs to wait 24 hours before grouting. I will teach you all you need to know about finishing off the dish even if you don’t complete the project in the day. The dish can be in your colour scheme and design and I have lots of patterns to work from if you need help with the design. If you’d like to make one of these do get in touch. The dish will cost £70 for the day, including all materials.
Share this:

Elderflower Cordial
My mother used to make Elderflower Champagne, an ostensibly non-alcoholic drink that used to explode with fizziness – I mean literally explode! One went in the boot of the car on our way to the beach, one exploded in storage, all rather messy. I made some many years ago but it proved too gassy for me, indeed, had it not been in plastic fizzy bottles it would have exploded too.
However, my daughter suggested making elderflower cordial which uses citric acid to kill the yeast, so no fizz. I missed the elderflower last year but harvested early this year.
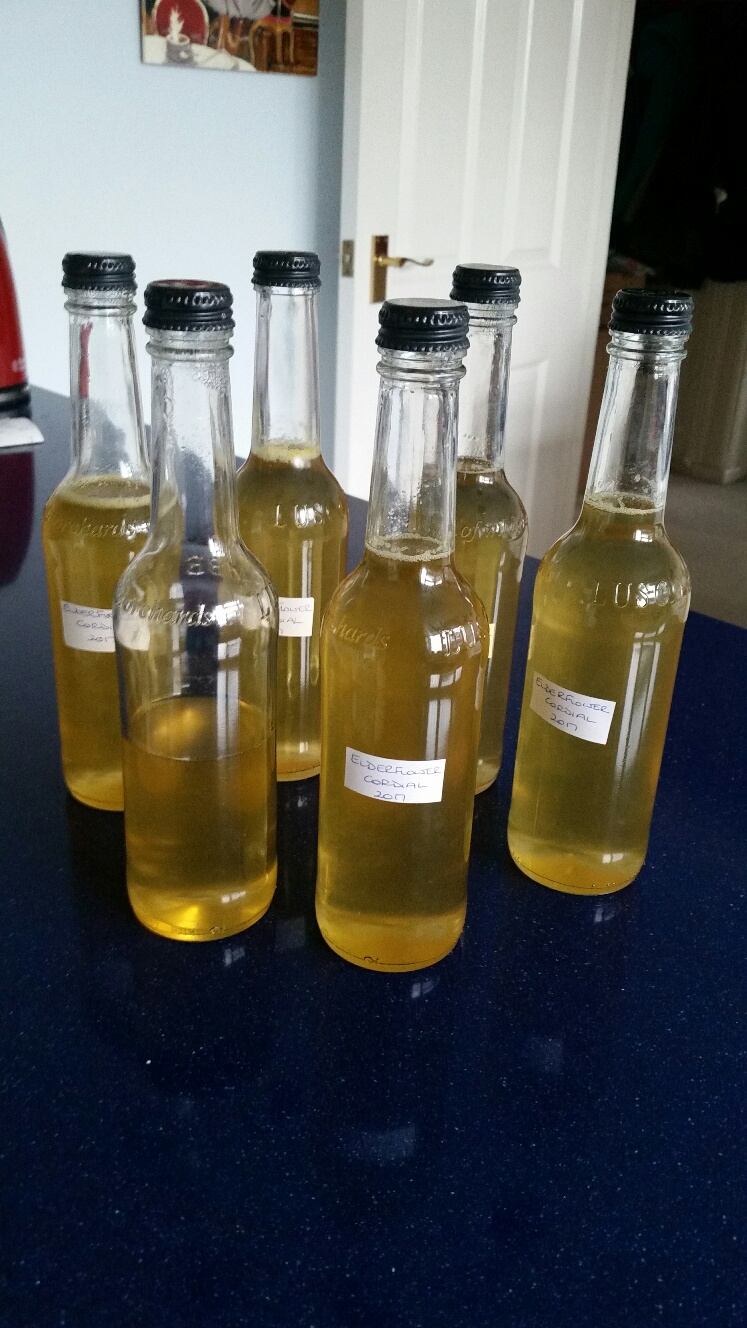
I used the River Cottage recipe and it is rather lovely, tasty and light but a bit sweet. I think I’ll use less sugar next year. So, anyone visiting can be offered a drink of home made elderflower.
Share this:

2017 Brochure available
My new Brochure is now available. Do have a browse, it’s full of colourful glass pieces, some of which are even useful. Prices range from £4.95 so lots to look at.
I have a guest for a workshop of Friday so I’ll post after that with her mosaic success. I’m sure we’ll have a lovely day.
